
At WPLH, we offer free migration services for all new customers. However, if you’re not a customer or simply prefer to handle the migration yourself, this guide will walk you through the process.
Manual WordPress Website Migration: A Preferred Approach
While there are numerous plugins available to assist with website migration, we at WPLH prefer to carry out this process manually. This approach ensures greater control and minimizes the risk of potential issues.
Step 1: Back Up Your Website
The first and most crucial step in any migration process is to back up your website files. Here’s how to do it:
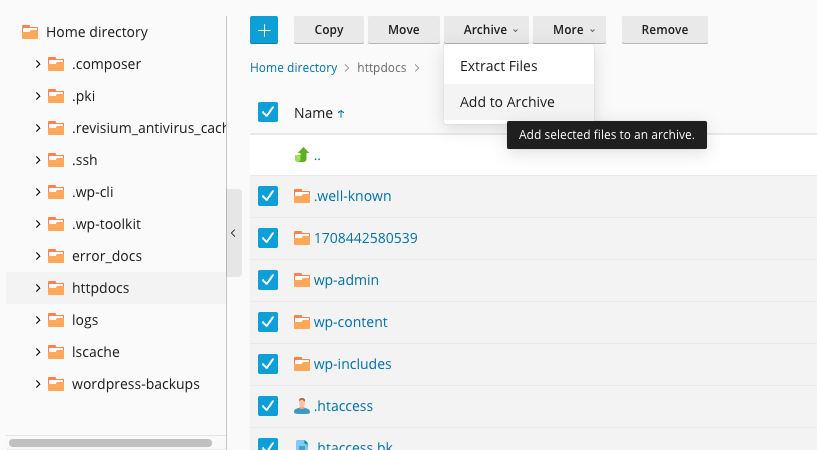
- Access Your File Manager: Log in to your hosting provider’s control panel and navigate to the file manager.
- Select Website Files: Locate the directory containing your WordPress files (typically where you find the
wp-content,wp-includes, andwp-adminfolders). - Compress and Download: Select all files and compress them into an archive. The preferred compression format is TAR, but ZIP is a viable alternative if TAR isn’t available. Once compressed, download the backup to your local system.
Step 2: Export Your Database
Next, you’ll need to export your WordPress database. This process ensures that all your content, settings, and configurations are preserved.
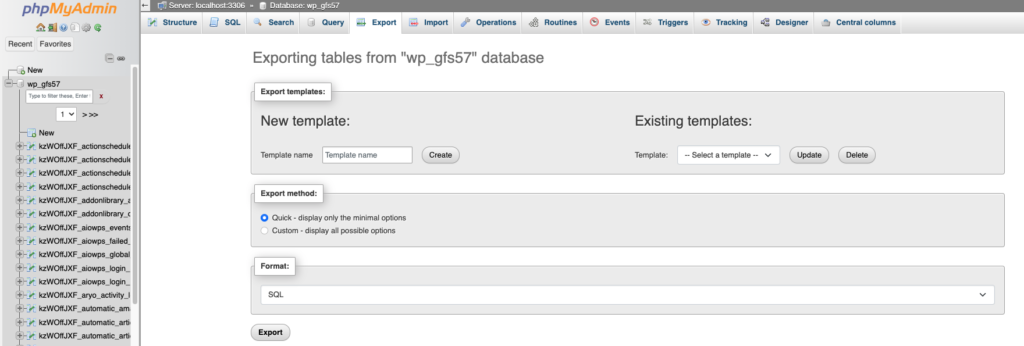
- Locate Your Database Name: Open the
wp-config.phpfile in your WordPress root directory and find theDB_NAMEvariable. This is the name of your database. - Export via phpMyAdmin: Log in to phpMyAdmin through your hosting control panel, select the correct database, and export it. This will generate a SQL dump file, which contains all your database information.
Step 3: Upload Your Website to the New Hosting
With your files and database securely backed up, it’s time to upload them to the new hosting environment.
- Create a New Database: Use your new hosting provider’s control panel to create a new database. Note down the database name, user, and password.
- Import Your Database: Access phpMyAdmin on the new hosting, select the newly created database, and import the SQL dump file.
- Upload Website Files: Use the file manager to upload the archive containing your website files. Once uploaded, extract the contents into the appropriate directory.
Step 4: Update the wp-config.php File
After uploading your files and database, you need to update the wp-config.php file with the new database credentials.
- Modify Database Credentials: Open the
wp-config.phpfile and update theDB_NAME,DB_USER, andDB_PASSWORDvariables with the details of the new database. - Check
DB_HOST: In most cases, theDB_HOSTvalue remainslocalhostor127.0.0.1. However, if your previous hosting provider used a different setting (common with hosts like GoDaddy), you may need to update this value as well.
Step 5: Migrate Email Services
If your domain is connected to email services such as Office 365 or Google Workspace, don’t forget to update your MX and other DNS records in the new hosting provider’s DNS control panel.
- Recreate Email Accounts: If your emails were previously hosted with your old provider, you’ll need to recreate the accounts on the new hosting service.
- Migrate Email Content: Migrating existing emails can be complex. It’s advisable to reach out to your new hosting provider for assistance with this step.
Step 6: Update DNS Settings
The final step in your migration process is to update the DNS settings to point to your new hosting provider.
- Update Nameservers: Log in to your domain registrar (the service where you registered your domain) and update the nameservers to those provided by your new host.
- Propagation Time: Be aware that DNS changes can take anywhere from a few minutes to 48 hours to fully propagate across the internet.